insulate naturally
Discover forest climate at home
request a free brochure

insulate naturally
Discover forest climate at home
request a free brochure
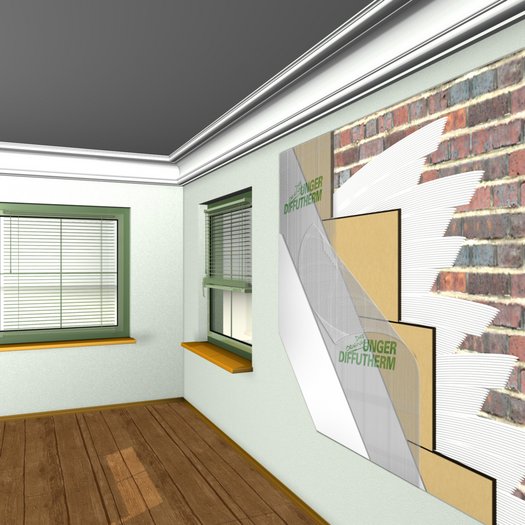
 UdiIN 2CM® SYSTEM slim interior insulation system
- Saves space due to slim 2 cm construction
- For every room, with little space
- Bridges cracks on all surfaces
- Easy assembly by gluing
- No emission of pollutants, improves air humidity and room climate
- Warm outside walls in winter, the feeling of cold disappears
The interior insulation made from wood fibres with climate chambers
The UdiIN 2CM® SYSTEM insulation board is comprised of a matrix of a multitude of chambers enclosing stationary air columns bonded to a capillary-active UdiWood-Fibre Insulation Board. It is notable for its very slim construction depth of approx. 25 mm. The boards are installed by simply gluing them to the wall using UdiFOUNDATION® COAT. This is also subsequently used, together with UdiREINFORCEMENT® Strengthening Mesh, to coat the surface of the boards. This surface can then be wallpapered, painted or tiled. It is also possible to apply additional plaster coatings using UdiLIVE® loam or lime plasters.
Due to its high thermal storage capacity of the wood fibre layer in combination with the insulating effect of the stationary air columns, the surface temperature of the UdiIN 2CM® SYSTEM is much higher than a traditional plastered brick wall, for example.
Quick and simple installation
The system can be installed very quickly and with very little effort. It is accomplished in only a few steps.
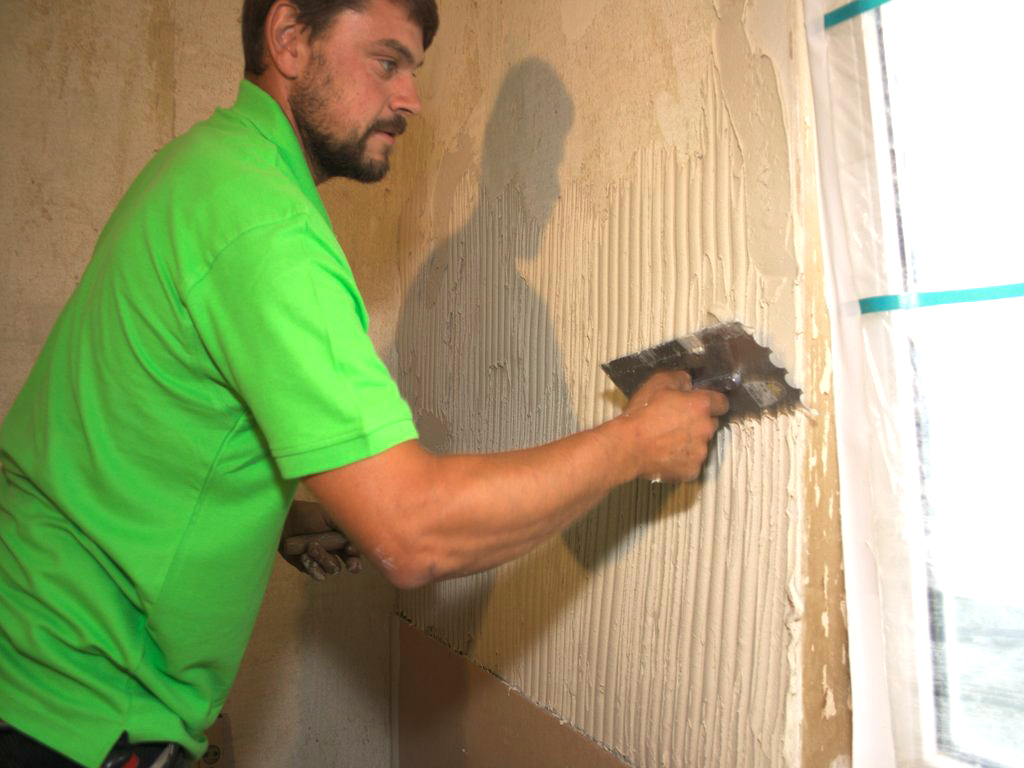
Step 1. Applying the adhesive layer
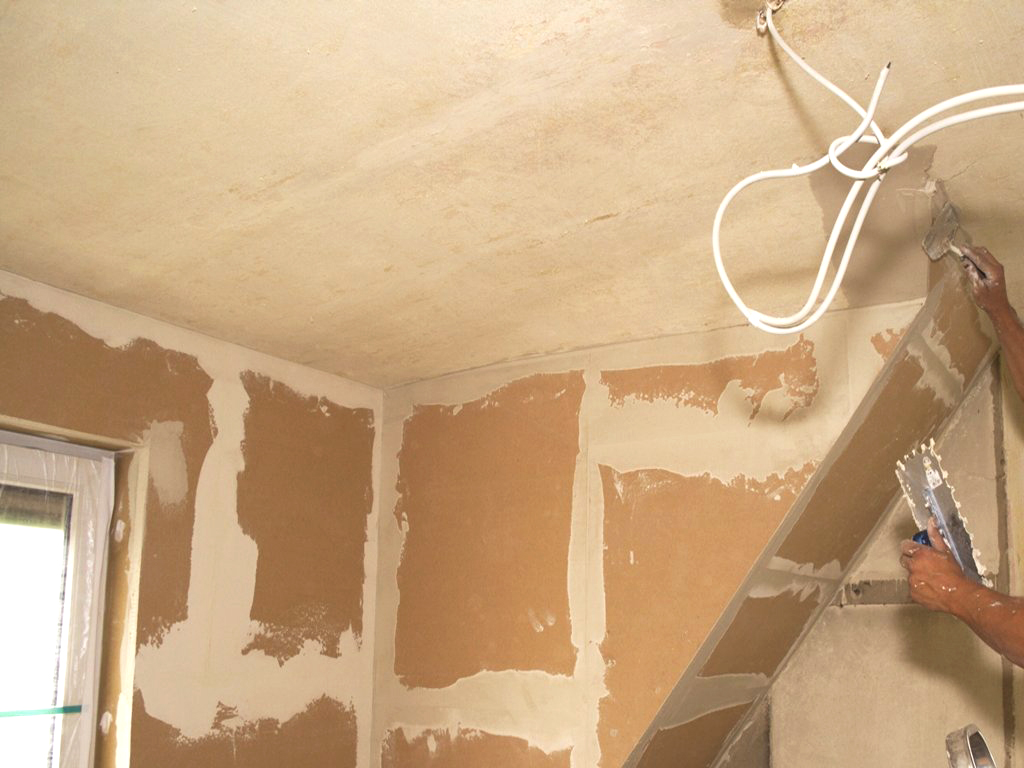
Firstly, check the stability of the surface of the substrate to be insulated. Mix the UdiFOUNDATION® COAT and apply a 6 -8 mm layer directly to the substrate using a toothed trowel. The thickness of the coat may vary depending on the surface characteristics.
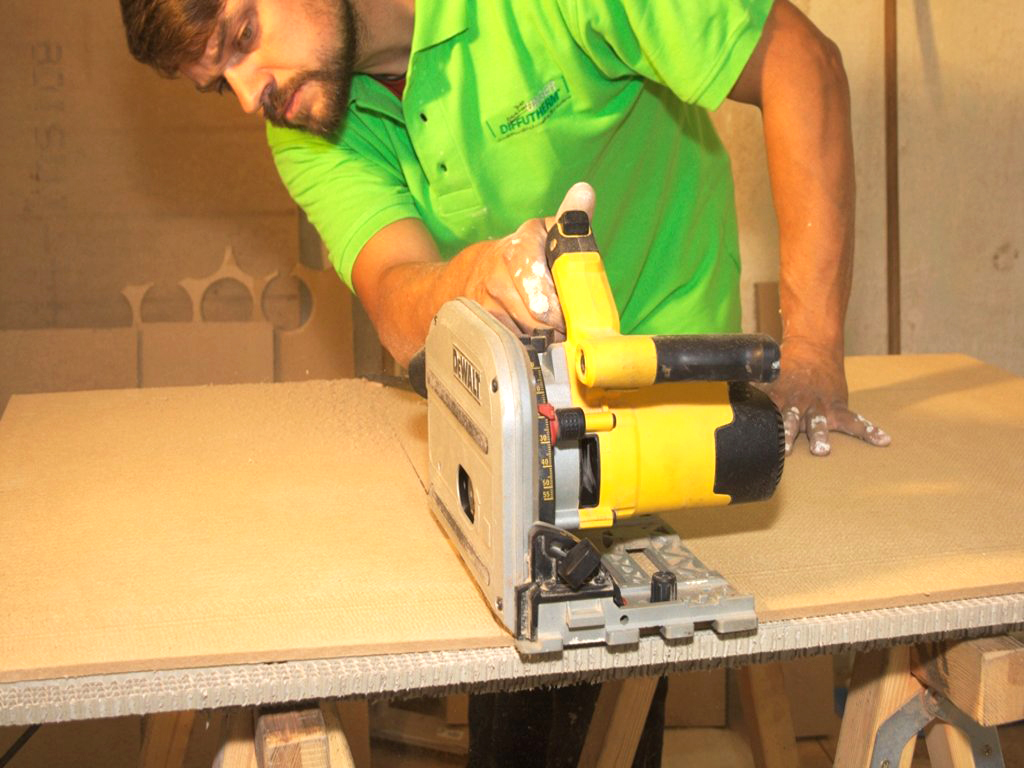
Step 2. Cutting the boards
A woodworking machine, circular saw or jigsaw is recommended for cutting the UdiIN 2CM® Insulation Boards to size, but even a craft knife can be used.
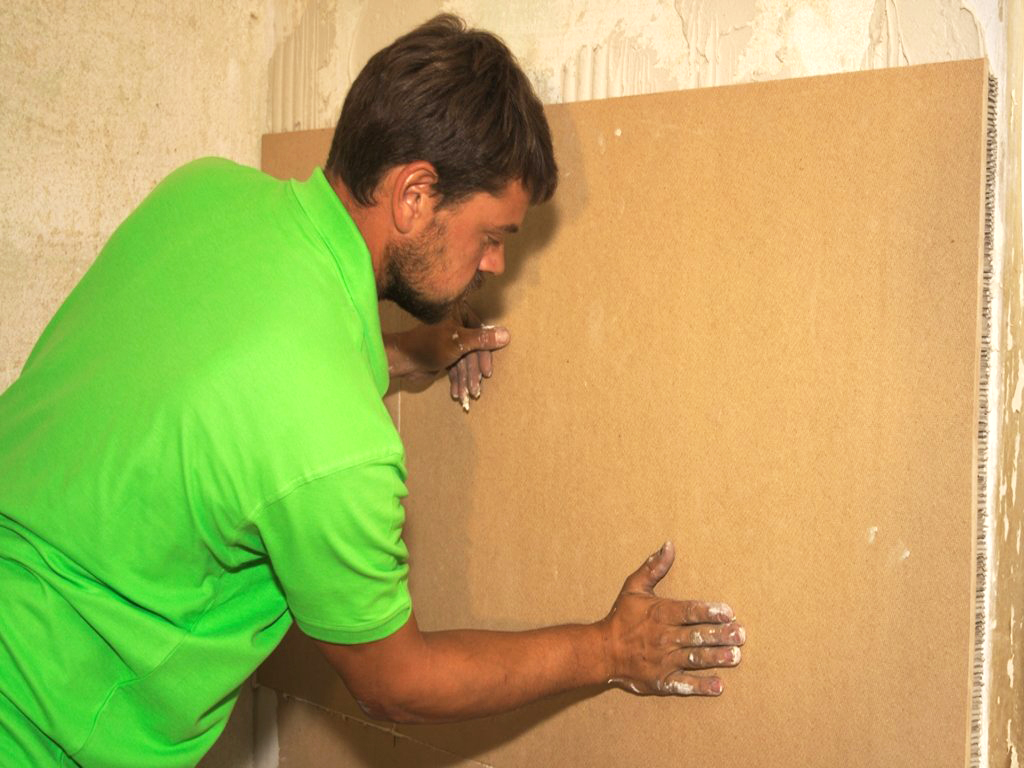
Step 3. Installing the boards
The insulation boards are pressed into the bed of UdiFOUNDATION® COAT using light, uniform pressure. A drying time of around 2 days should be allowed (at normal temperature 18° C and 60 % relative humidity).
Step 4. Base coat and reinforcing mesh
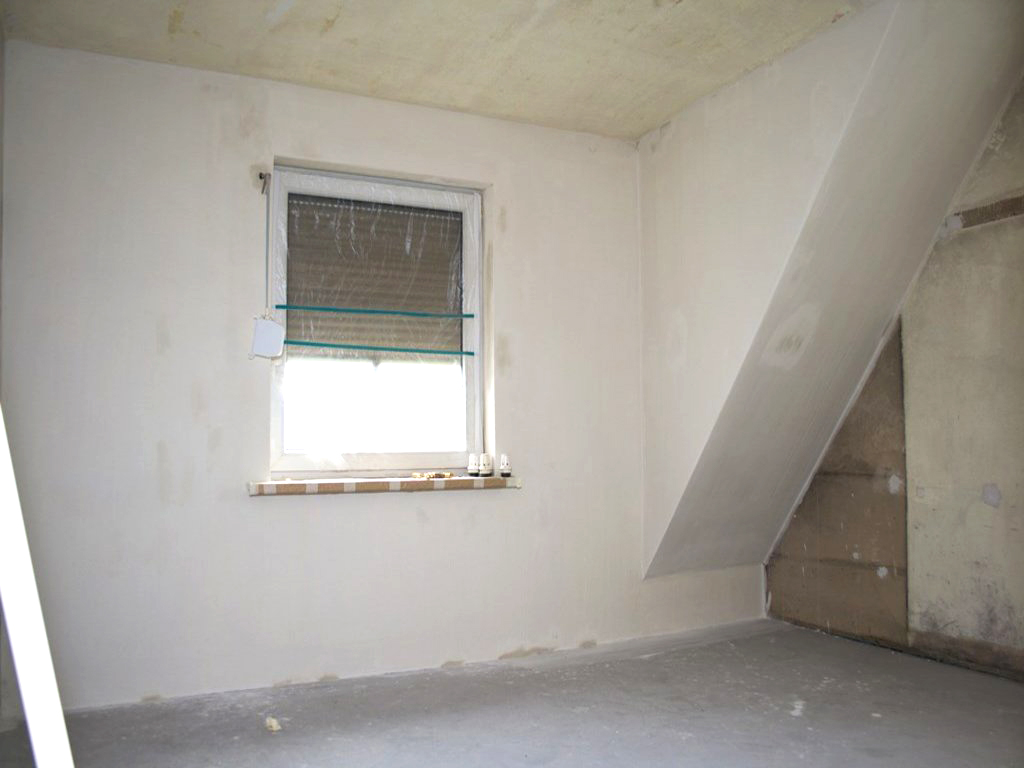
The subsequent coating of the wood-fibre insulation boards provides the system with increased stability and permanent crack coverage. The specially developed reinforcing coating UdiFOUNDATION® COAT is applied using a toothed trowel to a minimum depth of 5 mm and the UdiREINFORCEMENT® Strengthening Mesh is then bedded-in to the coating. This is the base for a durable and crack-free top layer of finishing plaster. Now the final step is to apply the top coat using a material of your choice. It does not matter which one you choose. Loam/clay plaster, loam/clay paint or lime plasters and silicate paints from the UdiLIVE®-System are especially recommended but wallpaper or tiles are also possible. Using this system you can, of course, also renovate ceilings and the interior surfaces of pitched roofs which require renewal. In corner areas (internal and external corners) UdiREINFORCEMENT® Corner Protection Profiles should also be installed. Alternatively, an exact joint can be formed and then filled with a suitable, paintable sealant.

Properties
- Easy installation by gluing
- Bridges cracks
- Seldom used rooms warm up very quickly
- Perceptibly warmer exterior wall surfaces in winter
- Reduces noise levels in the building
- Quickly installed without wall plugs/fixings
- For every room where space is limited
- Increases the surface temperature / The sensation of cold disappears